Sometimes a designer of original artwork will not care how his/her design should be printed and with what kind of printer. So the original design might be in CMYK, or with a transparent layer, in rough resolution, with Pantone colors, everything can happen.
If an original image is on the Transparent Layer, GT-3 has a useful new function available. Save the image in PNG file with RGB color mode, and use SeparatePNG.exe in [ Brother GT-3 Tools ]. There you can find ReadMe to give you the instruction.
With SeparatePNG.exe, it is much easier to make gradation on the transparent layer than GT-782, but still as for other issues, everything is up to you to print it in the best way for your customer.
|
The key is to control Tolerance and Customer Color of Transparent Color in Printer Driver Advanced menu. With these two, control the mixing of the image color and transparent color used for "background" in application software.
|
|
|
 |
Tolerance |
| |
The bigger the number, the wider the transparent colors. If you select "30", this means how different and how far the two colors (RGB values) are.
See the following sample and just imagine what's going on with the printer driver. Details are not precisely reproduced by GT File Viewer, but you can see where the white mask starts according to the Tolerance. Even Tolerance=0 the printer driver has some margins, not to produce sudden change of colors.
|
| |

Test sample, a gradation from RGB=0 black to RGB=128 gray, 600dpi,
transparent color is RGB=0, printed by Photoshop CS
 
Tolerance=0, CMYK data and white data on light gray by Brother GT File Viewer
 
Tolerance=30 (default)
 
Tolerance=50 (maximum)
|
 |
Custom Color of Transparent Color |
| |
Compare the following images. You can see that the mixing of colors depends of the background (garment) color. We do not recommend putting RGB=255 white background as Transparent Color because all those fading dots will turn to be bright white. This is just like the anti-alias ghost issue.
| |
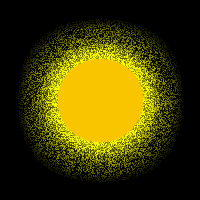 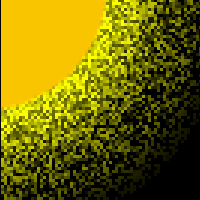
 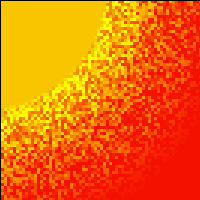
 
|
The best way is to make print data one by one by changing the transparent (background) color. The Custom Color must be the background color. Tolerance should be arranged by checking with GT File Viewer.
If you do not want to make many print data, try this way:
How to retouch:
 If there are no dark colors in the image, put black background and turn the check box of "print with black ink" OFF. If there are no dark colors in the image, put black background and turn the check box of "print with black ink" OFF.
 If you print on black garment and the image has some darker colors, fill the transparent background as RGB=0 black and print with black ink, but Custom Color is RGB=(0,0,0). Manage the Tolerance, generally speaking, bigger (50) is better. If you print on black garment and the image has some darker colors, fill the transparent background as RGB=0 black and print with black ink, but Custom Color is RGB=(0,0,0). Manage the Tolerance, generally speaking, bigger (50) is better.
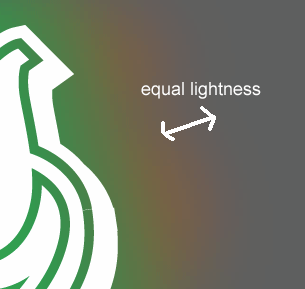
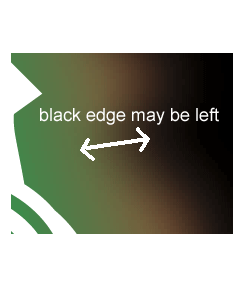
 If you are going to print on the garment of different colors, fill the transparent background as "as dark gray as the fading color" as possible. This means that "match the lightness". If you are going to print on the garment of different colors, fill the transparent background as "as dark gray as the fading color" as possible. This means that "match the lightness". |
|
Of course if no anti-alias around the image, then you can select any color as transparent background.
|
 Tolerance always depends on the original artwork. Just try and check with Brother GT File Viewer. Tolerance always depends on the original artwork. Just try and check with Brother GT File Viewer.
|
*******************************
|
You can see the difference between the print on a white material and the print on white ink. Please pay more attention when you print with using white ink.
|
 Sometimes you can see some thin tails in the print data. (You can see them in the image above.) This is because of the resampling by the application caused by the resolution of the image, which sometimes causes accidental issues. In this case the issue disappears when you match the resolution of the image and the printer (600/1200dpi) but the file size and the resampling time will be incredible.) Be sure to check the print data with the zoom function of Brother GT-3 File Viewer. Sometimes you can see some thin tails in the print data. (You can see them in the image above.) This is because of the resampling by the application caused by the resolution of the image, which sometimes causes accidental issues. In this case the issue disappears when you match the resolution of the image and the printer (600/1200dpi) but the file size and the resampling time will be incredible.) Be sure to check the print data with the zoom function of Brother GT-3 File Viewer.
|
| |
|