If you want to print good, adjust your printer right.
A print result is good when the printer works good, mainly the print heads fire ink at the right position on the print media. To do this, the most important thing is the position of the Print Head. Print the Standard Check Pattern and confirm the result of print head alignment if you can see one of the inks can be seen. Also the levelness of the table and the Platen. These are the basic points.
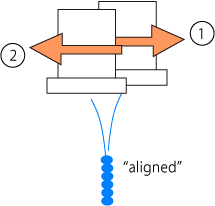
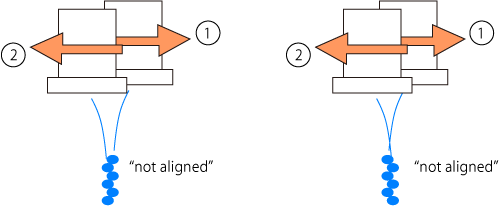
Next, check the straight lines in the Standard Check Pattern (GT-3 Nozzle Check Pattern is no more available, it is just a line of dots to save print time) if the four print heads align properly. If you change the Platen Sheet to new, if you use some of the modified platens, be sure to adjust the timing of firing (the position of ink dots).
|
|
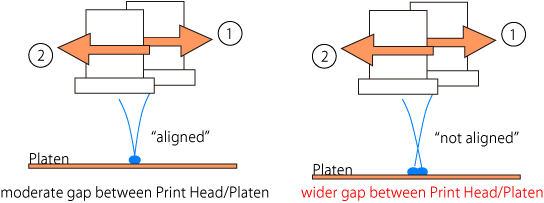
You can see how important to adjust the firing timing, as well as the Platen Height. If the Platen is lower, then the situation is the same.
|
|
The timing of firing is the very important to keep the print quality, as well as the firing. In your daily work, pay attention to the Platen Height after you execute the Firing Adjustment.
|
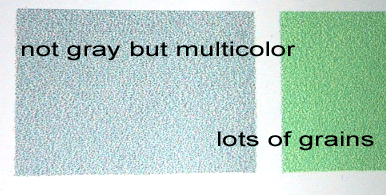
 If the timing of firing is not well adjusted, not only the printer print a single line double, but also solid area would be printed with dirty grains, like a print result on "lower" platen with wider gap. If the timing of firing is not well adjusted, not only the printer print a single line double, but also solid area would be printed with dirty grains, like a print result on "lower" platen with wider gap.
|
|
GT-3 has "Firing Adjustment" menu in [ GT-3 Maintenance ] of [ Brother GT-3 Tools]. It is to adjust the timing of bi-directional printing. CMYK and White separately. Be sure that the Platen is at the highest position "A". You will have to do this four times, two resolutions, CMYK/White, but this adjustment is very, very important for precise print to avoid grainy printing.
Then, the final arrangement, Alignment of white and color print heads, which is the same as the Screen printing.
 This adjustment is mainly required when you change Print Head(s). But if you use specific platen rather than the standard 14x16, then we recommend you adjust the platen. This is the most important
to keep print quality. This adjustment is mainly required when you change Print Head(s). But if you use specific platen rather than the standard 14x16, then we recommend you adjust the platen. This is the most important
to keep print quality.
|
Select [ Brother GT-3 Tools ] in your PC and select [ GT-3 Maintenance ].
Be sure to adjust firing first and then align the CMYK/White print heads. |
|
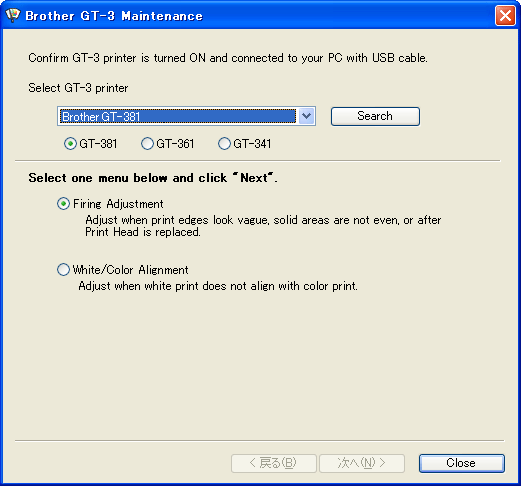
Here is the top menu of Brother GT-3 Maintenance. |
|
 |
Firing Adjustment |
| |
Adjust the timing of bi-directional printing. |
| |
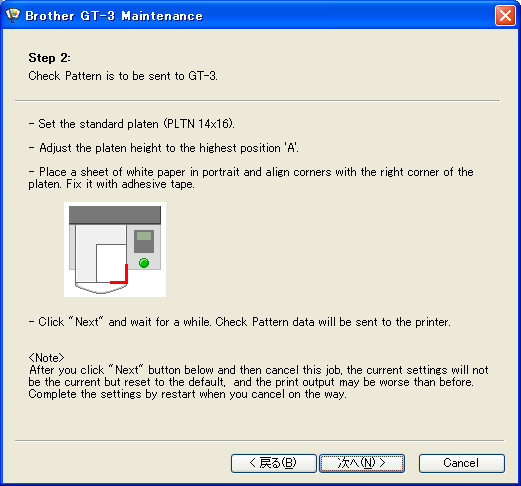
Follow the instructions and select the combination of the resolution and CMYK/White print heads. In the menu, you can refer to the example to select the right answer in the printing result.
|
| |
|
| |
After adjusting the firing for all combinations, then go to White/Color Alignment.
|
 |
White/Color Alignment |
| |
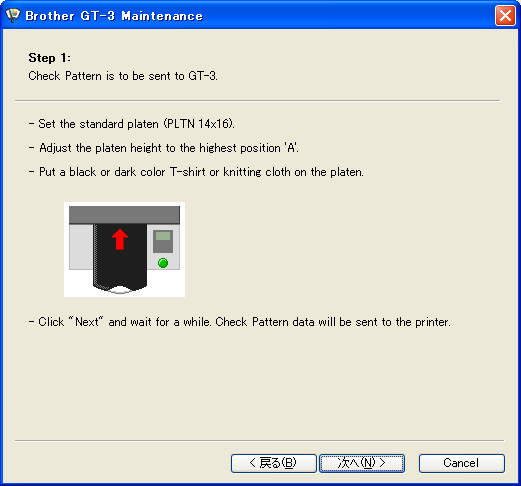
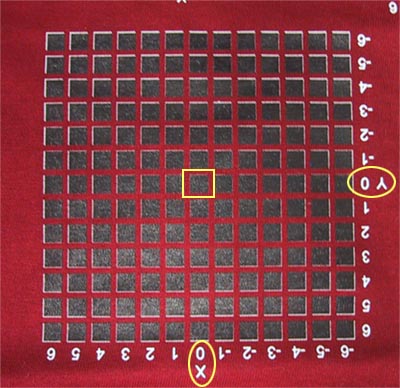
Follow the instructions and select the combination of print heads and platen. You do not have to prepare pretreated T-shirt, but pretreated one is easier to check. Whatever color will be OK except white T-shirt. Do not use paper because ink is too much to check.
|
| |
|
| |
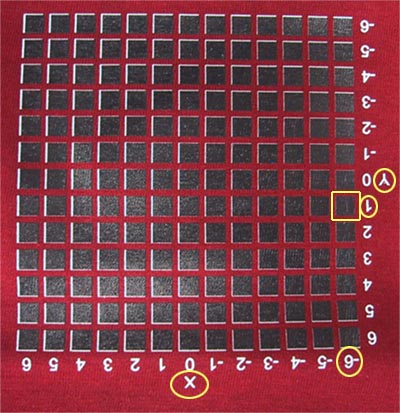
The following image is just after the first print. Find out the best position of XY-axis; X=-6, Y=1. | |
| |
|
| |
The following image is the adjusted second print. Good alignment! This print data is "not choking". | |
| |
|
| |
After adjusting the alignment for both platens, your GT-3 is ready to print!!
|
| |
 To get Log file of your GT-3, use USB flash drive and select the menu [ Log Copy to USB ] in [ Maintenance ]. Follow the instruction on the Panel. Wait for a while until the Print Button stops blinking and the printer bells. Get the log file when you have some serious trouble and your dealer or service engineer asks you to get log of GT-3 printer. Thank you for your cooperation! To get Log file of your GT-3, use USB flash drive and select the menu [ Log Copy to USB ] in [ Maintenance ]. Follow the instruction on the Panel. Wait for a while until the Print Button stops blinking and the printer bells. Get the log file when you have some serious trouble and your dealer or service engineer asks you to get log of GT-3 printer. Thank you for your cooperation!
|
|