| |
CorelDRAW X5 was newly released and we found that their color management has been greatly changed in both user interface and the way they produce colors. Of course it is good for precise color management but on the other hand some users who use CorelDRAW for a long time may be confused. Especially if you are a user of CMYK clipart, sorry to say but you cannot print them in the same vividness as you did with CorelDRAW X4 or the previous versions.
|
| |
This image is one of the clipart in CorelDRAW 9. Each color is described with CMYK colors. Compare those two previews: the original image is the same, simply printed under proper Color Management settings but the previews are ...
|
| |
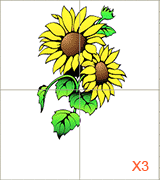 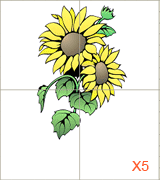
Preview of CorelDRAW X3 and CorelDRAW X5 output
|
| |
You cannot get the same output as X3 unless you retouch the image (described later in this page) or use [ Saturation / Contrast ] menu in GT-3 Printer Driver, which is just like Photoshop color management. This is a big issue.
|
| |
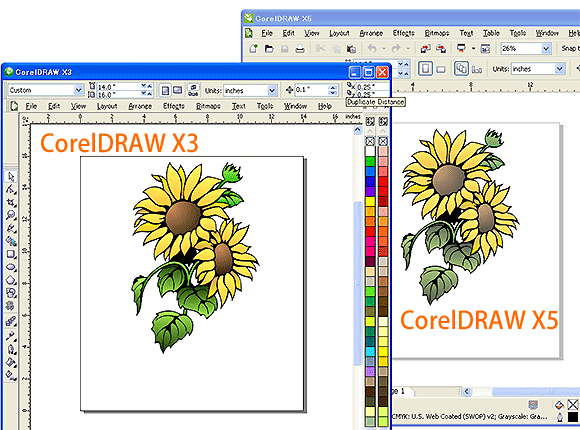
But still CorelDRAW X5 is user-friendly. See the following image, you can see easily that CorelDRAW X5 would print the image "less vividly" than CorelDRAW X3 before you go to [ Print ] menu.
|
| |
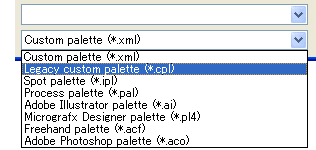
The other big change is CorelDRAW X5 change the format of Color Palette and their file extension changes from ".cpl" to ".xml". But you can open the "legacy" Color Palettes too by selecting the pull-down menu.
Let's change our mind and learn the new settings.
|
 Color Management Settings Color Management Settings |
| |
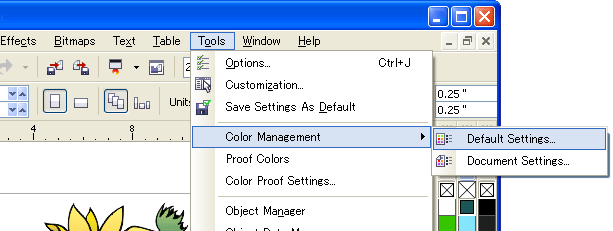
CorelDRAW X5 has two types of color management settings; [ Default Settings ] for overall color management and [ Document Settings ] for each document independently. Select [ Tools ] > [ Color Management ] menu.
|
| 1. |
First of all we arrange the [ Default Settings ] before you start.
Select [ Tools ] > [ Color Management ] > [ Default Settings ] and click the pull-down [ Preset ].
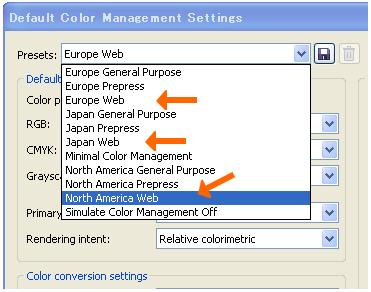
Select "Web" of your local area. This will help you to change less by starting from the default settings.
|
| 2. |
Arrange the menu marked with orange lines and confirm with green lines as shown in the below. As for CMYK default, it depends on the Presets, e.g. (Default) U.S. Web Coated (SWOP) v2 is for North America Web, ISO Coated v2 (ECI) for Europe Web and Japan Color 2001 Coated for Japan Web. After arranging the entire menu, Presets will turn "Custom". Click "floppy icon" next to "Presets" to save these settings. |
| |
 If you are a Photoshop user, then you can understand the left menu easily: "default color settings" is the same with "Working Spaces". GT-3 is an RGB printer so keep the color space in RGB with sRGB ICE61966-2.1 color profile. If you are a Photoshop user, then you can understand the left menu easily: "default color settings" is the same with "Working Spaces". GT-3 is an RGB printer so keep the color space in RGB with sRGB ICE61966-2.1 color profile.
 Turn "Preserve pure black" checked then you can keep K=100% black as RGB=0 black. (Photoshop does not work like this.) Turn "Preserve pure black" checked then you can keep K=100% black as RGB=0 black. (Photoshop does not work like this.)
|
| |
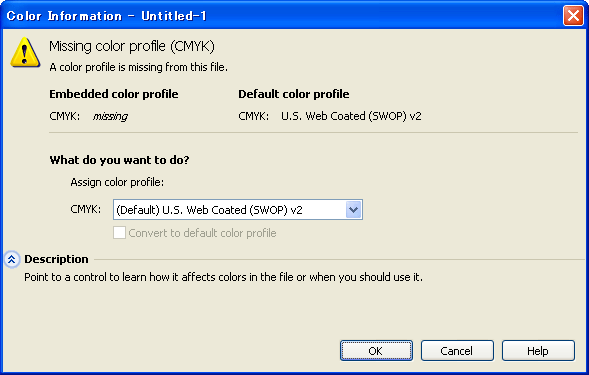
 The menu in the right is to show warning when mismatch or missing of color profiles. The warning dialog appears when you open the file with no color profile embedded in the original image, or color profile mismatching. Confirm the situation and click [ OK ] button. The menu in the right is to show warning when mismatch or missing of color profiles. The warning dialog appears when you open the file with no color profile embedded in the original image, or color profile mismatching. Confirm the situation and click [ OK ] button.
|
| |
|
| 3. |
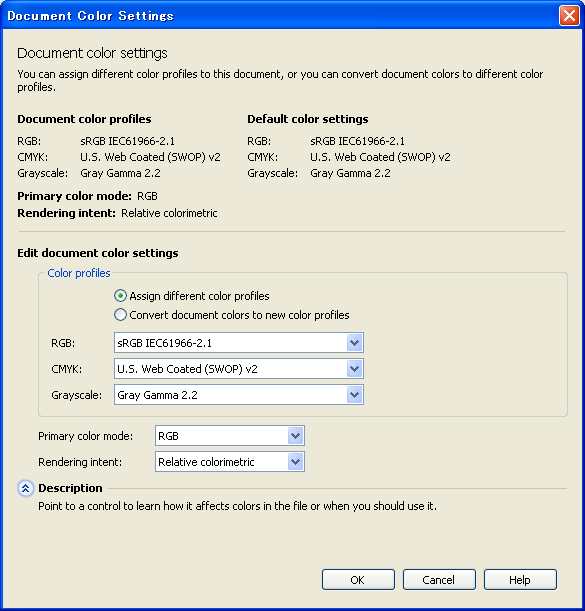
Confirm that these settings are the same with "Default Settings. Open an image file and select [ Tools ] > [ Color Management ] > [ Document Settings ]. This is the color settings for the operating file now. Confirm that "Primary color mode" is RGB and other settings are the same as those in [ Default settings ].
|
 Color Palette in Drawing Color Palette in Drawing
|
| 1. |
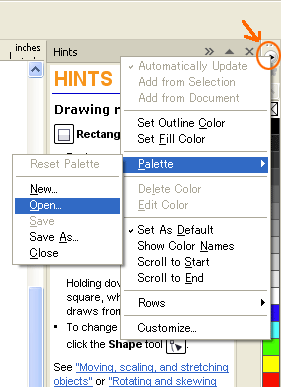
When the color management is properly done (see the steps above) then CorelDRAW X5 opens RGB palette as default. Also they change the format (file extension changes from ".cpl" to ".xml") so we need a little trick to open GT-3 Color Palettes by using by selecting the pull-down menu to select "Legacy custom palette" and open "GT_Colors.clp" and "GT_Tshirts.clp" originally saved in [ Useful Tools ] of [ Brother GT-3 Tools ]
|
|
| 2. |
After you open "Legacy format" Color Palettes, save them in the present format by [ Save As... ] menu.
|
| |
 Do not use HKS, Pantone® and other spot color palettes for GT-3, because those spot colors are treated "special" for screenprinting color separation (remember you can print each color by print menu). CorelDRAW X5 simulates those spot colors in RGB colors but those RGB values are not vivid for inkjet printer. Do not use HKS, Pantone® and other spot color palettes for GT-3, because those spot colors are treated "special" for screenprinting color separation (remember you can print each color by print menu). CorelDRAW X5 simulates those spot colors in RGB colors but those RGB values are not vivid for inkjet printer.
If the image is filled with colors of those palettes, it is better to refill with colors in GT_Colors.cpl and GT_Tshirts.clp or Default RGB palette instead, especially in Yellow, Black, Purple.
|
 |
Change RGB=255 to 254 |
| |
Corel DRAW X5 is the same with CorelDRAW X4 or the former versions in replacing Bitmap colors. See CorelDRAW page for details.
 Be sure to check the print data with GT File Viewer before you print. Be sure to check the print data with GT File Viewer before you print.
|
| |
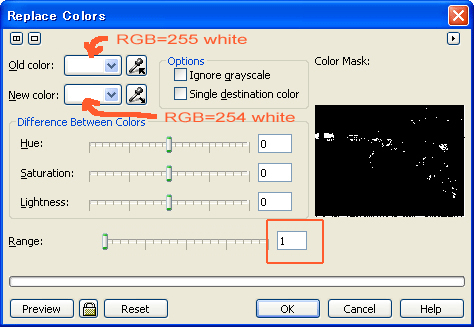
Select [ Effects ] > [ Adjust ] > [ Replace Colors ] menu. Set RGB=255 white to [ Old color ] and RGB=254 to [ New color ]. Set [ Range ] to [ 1 ] and click "OK".
|
| |
Then RGB=255 white are replaced to RGB=254 white.
|
 |
Convert to Bitmap |
| |
X5 has a simpler menu: they must success in total color management.
If you want to add some effects, e.g. stronger colors, replacing colors, to the vector object, you will convert vector data to Bitmap. In this case, convert to RGB Bitmap as follows.
|
| 1. |
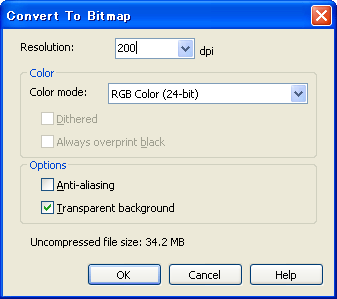
Select [ Bitmaps ] > [ Convert to Bitmap... ] menu. |
| 2. |
Keep the resolution at least 200 dpi or higher, depending on the image (photo/clipart) and the size. Make sure that "Color" is [ RGB Color (24-bit) ].
If you print with White Ink, make sure that "Anti-aliasing" is OFF.
|
 |
Change colors in bitmap data |
| |
Before showing how-to, learn about the big difference between CorelDRAW X5 and the former versions.
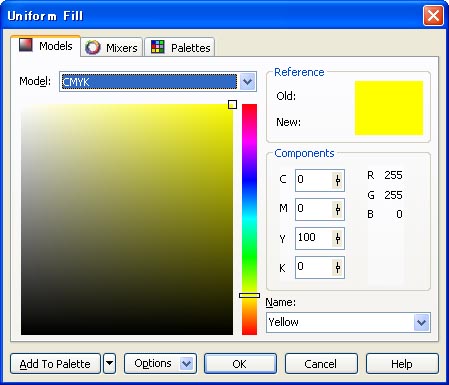
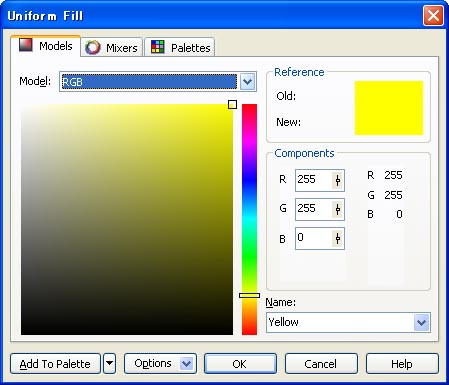
"Color translation" between RGB and CMYK done by CorelDRAW X4 and the former version was simple: for example, maximum yellow in RGB (R=G=255, B=0) is always maximum yellow in CMYK (Y=100%). Yellow is always yellow.
CorelDRAW X3:
|
| |
But in CorelDRAW X5, because of their improved color matching system, they match the real "U.S. Web Coated (SWOP) v2" yellow 100% to "sRGB ICE61966-2.1" a-little-reddish-pale R=255, G=242, B=18 yellow.
CorelDRAW X5:
 
 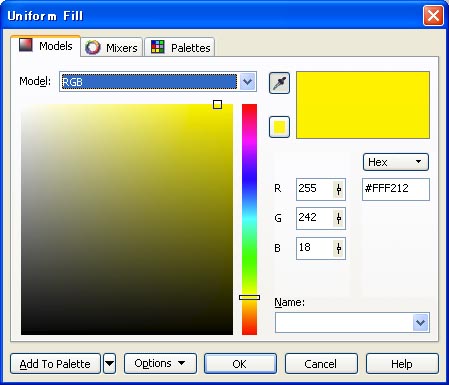
That's why the sunflower image will no longer print bright. You need to improve colors by yourself.
|
| |
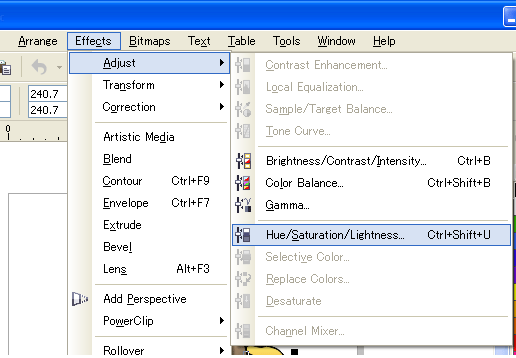
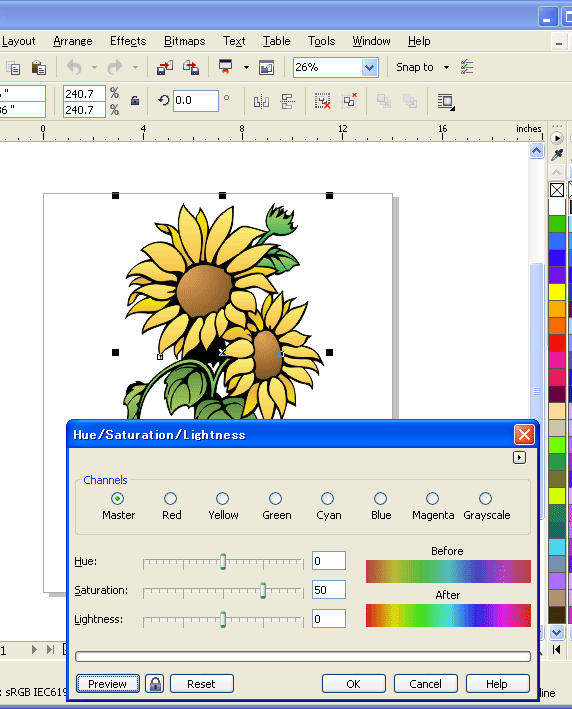
The simple way is to increase Saturation of colors. Select the object you want to modify and select [ Effects ] > [ Adjust ] > [ Hue/Saturation/Lightness... ].
Increase Saturation and confirm the change by clicking [ Preview ] button.
|
| |
Or convert the object to bitmap (see  above) and select [ Effects ] > [ Adjust ] > [ Tone Curve ... ]. Move the graph and confirm the change by clicking [ Preview ] button. above) and select [ Effects ] > [ Adjust ] > [ Tone Curve ... ]. Move the graph and confirm the change by clicking [ Preview ] button.
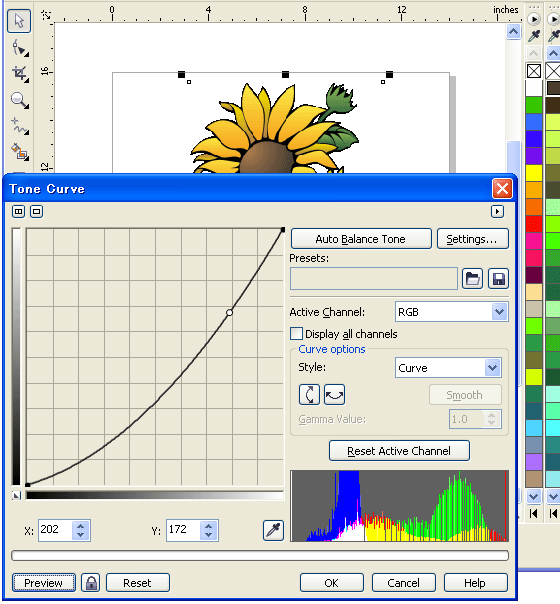
Of course you can combine those tools and others in [ Adjust ] menu. Try every tool to improve your image.
|
| |
As for the details, refer to the CorelDRAW manual. There are many ways to arrange the image. Try and find the best way with CorelDRAW.
|
| |
 These are helpful with previewing the image. But if you need something easy and handy, use printer Driver Color Processing "Saturation and Contrast" menu. These are helpful with previewing the image. But if you need something easy and handy, use printer Driver Color Processing "Saturation and Contrast" menu.
|